Whether you are a hobbyist winemaker or this is your first year as an established commercial winery, there are several key elements that can help make your first harvest go smoothly. Today, we’re going to review a few of those basic elements to avoid walking into harvest with an overwhelming feeling.
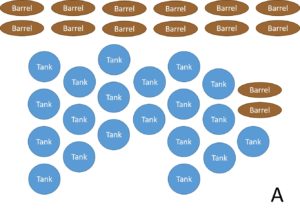
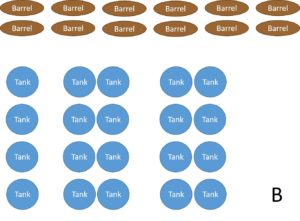
1. Draw out an image of your production space. Determine the flow of the wine.
Moving fruit/wine back and forth within the production space can get time-consuming and can also contribute to the degradation of wine quality. Therefore, consider organizing similar pieces of equipment into designated spaces. For example, lining up tanks and fermentation vessels helps make them easily accessible. Wineries are often laid out in a compartmentalized fashion: fermentation tank space separated from storage tank space or barrel space.
Once the space is properly set up, accurate measurements can be taken to determine appropriate lengths of hoses that are required to move material from one location to the next.
Two other key spaces that should be thought out include storage space and laboratory (lab) space. Storage is highly under-estimated when it comes to winery planning. Many people assume they will take much longer to outgrow a space. However, no matter how small or large your winery is, there are a few key storage areas I like to remember including:
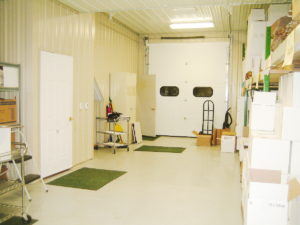
- Food grade dry goods (e.g., ingredients like sugar or food grade tartaric acid and processing aids like yeast and fining agents). Gather and organize technical data sheets for each of these materials for information on best storage practices.
- Cleaning and sanitation chemicals, which should be separated from any food grade supplies and appropriately labeled.
- Packaging materials, such as bottles, corks, capsules, etc. These should have their own storage space, separated from the primary production space, to avoid getting wet or contaminated with anything produced in the winery.
- Post-packaged cases that contain finished bottles of wine. Again, storage conditions may be quite different from the environmental conditions affiliated with tanks and barrels. Plus, you’ll want a space that maintains their ability to stay dry and away from production operations.
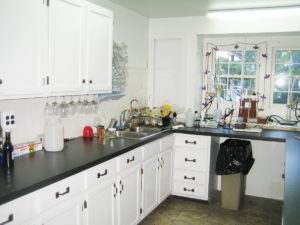
Lab space is another area that is highly under-estimated, and I encourage new operations to avoid the mentality of thinking the wine can be produced in good quality without any analytical component. Having a designated space to take wine samples and run some quick analyses is focused, allowing for separation between production and analysis, as well as efficient, as the winemaker can run several analyses quickly and at one time. I’ll spend the next blog post and July Darn Good Winemakers session talking about wine lab basics with applicable solutions for any winery regardless of how many years you’ve crushed grapes. Until then, I’d encourage everyone to consider creating a lab space with window. One of the largest mental challenges for many winemakers is getting around doing wine analysis in an enclosed cold dark corner of the cellar. No one wants to work in that space!
2. Skip using barrels for your first year.
I know barrels are the quintessential most exciting purchase a budding winery can make. However, they are also a fairly expensive purchase. While many people gravitate to barreling wine on their first year, I usually try to delay my clients from using them right away unless they are focused on making a very specific style of wine. The first issue with barrels is that they take up space. Furthermore, the space they require has very different environmental conditions than that of your tanks and other production space. More importantly, using barrels is an easy place to mess up the wine. Most wine faults I taste come straight from barreled wines. While they may not look intimidating, the use of barrels requires a lot of attention to detail. Many people make the inherent mistake of adding wine to barrels and then leaving them for months on end without ever checking the wine. This is a guaranteed way to end up with faulted wine.
But if oak is something you really want in your wines, consider using oak alternatives or adjuncts in your first year of production. No, there are no dreamy wine barrels stacked against the back wall. However, there are a lot of good products out there that provide greater winemaker control over the wine’s quality and also integrate a good oak flavor. Oak adjuncts also extract oak flavors quickly, and allow the winemaker to bottle most wines sooner, which aids in cash flow.
3. Have a good list of suppliers to purchase materials.
I’m a huge proponent of having good suppliers, especially when it comes to enological products: the ingredients and processing aids added directly to the wine. I gravitate to purchasing enological supplies directly from the suppliers. Here’s a few, listed in alphabetical order:
When it comes to wine ingredients, while I know many home brewery and winery supply stores may offer smaller quantity ingredients, I highly recommend avoiding any ingredient or processing aid addition that does not come with an adequate technical data sheet, individual lot number, and/or clear expiration date. As a hobbyist, it’s fine to use these ingredients and processing aids. As a commercial winery, I recommend using traceable enological supplies with reputable production records.
Another benefit that comes from purchasing direct from the supplier is accessibility to their technical information. If you have a problem with Lallemand’s EC-1118 yeast, you can talk to someone from Scott Labs that can help trouble shoot the use of that product. You likely will not get that level of technical advice from a third party supplier like many brewing and winery supply stores.
Nonetheless, there are times when the brewing and winery supply stores really come in handy, especially for small operations. In these incidences, I recommend them all of the time. These supply stores are convenient places to purchase a lot of lab equipment and cellar supplies.
4. Plan now… ease into harvest later.
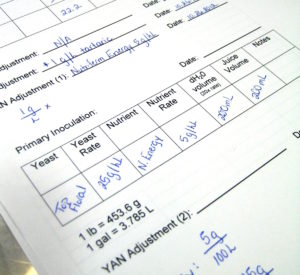
Planning never sounds glamorous, and I know this. But taking the time to prep for harvest can honestly help reduce a lot of the chaos and mistakes that get made during the harvest season. Plus, setting the stage with good production habits will avoid the operation from having to make drastic changes later.
I like to make sure I have all of my winemaking record templates printed and ready for harvest before the first batch of fruit hits the cellar floor. At minimum, I recommend that wineries have adequate templates for:
- Weigh bills or records for incoming fruit
- Tank inventory and processing records
- This may include additional templates like fermentation logs, wine analysis data sheets, and malolactic fermentation (MLF) logs.
- Eventually, you will also want a bottling record template.
- A spreadsheet system that you can create and manage in Excel. This should allow you to effectively transfer any information on your data records/templates while also monitoring the winemaking operations. Information from this system should be used to update your necessary TTB compliance documentation.
Many DGW clients find the Cellar Tools as helpful guides to get them on their right foot, especially during their first few years of harvest. DGW Cellar Tools provide necessary action items in a process flow format, checklists and timelines for specific operations (e.g., bottling, pre-harvest, post-harvest, etc.), and protocols for many winemaking operations.
Make the Most of Pre-Harvest Prep
If you’re not familiar with basics about wine regulations and winemaking records, I highly suggest the Winery Regulations course through Penn State’s Continuing Education Winemaking Certificate program. Winemaking educator and consultant, Bob Green, does a fantastic job at leading new wineries through federal and state compliance, explaining governmental forms, and providing examples for managing winemaking records. The Winery Regulations course is worth the $750 investment if you know you struggle in this area of wine production.
After the first year of production, I usually start working with clients on their FDA compliance documentation. The first year provides context and we use their practices to build upon current good manufacturing practices (cGMPs) policies and standard operating procedures (SOPs) for both production operations and sanitation. Again, this is a place where it is easier to start building the foundation early on, and build content over time.
